
How To Move AWS EC2 Instance From One Account To Another
- Amazon EC2
- Aws
- CLOUD HOSTING
- LINUX SERVER
Migrate EC2 Instance to Another Account
At KnackForge, besides Development Services we assist clients to set up servers and take the responsibility of ensuring that their sites and servers are running smoothly without any (or least) secure compromise.
We have tried different hosting providers ranging from a shared host like Bluehost to fully managed infrastructure providers like Amazon Web Services (AWS). AWS has been the best of our choices thus far and we prefer the same for hosting clients' sites.
While this blog title says moving of instance, technically we are not moving the instance, instead, we are creating a snapshot of the existing server (in the form of AMI) and with the same, we set up a new instance in a different account. The steps involved in this process have been explained in this post.
What is Amazon AMI?
An Amazon Machine Image (AMI) is a special type of pre-configured operating system and virtual application software which is used to create a virtual machine within the Amazon Elastic Compute Cloud (EC2). It serves as the basic unit of deployment for services delivered using EC2.
See https://aws.amazon.com/amis for more details about it.
Steps To Transfer AWS EC2 From One Account To Another
Log in to the AWS console of the account from which you want to move the instance, and navigate to the "Instances" pane. Right-click on the instance to be moved and choose "Create Image (EBS AMI)". Once done, you will receive a status message saying that the request was received and being processed to create an image.
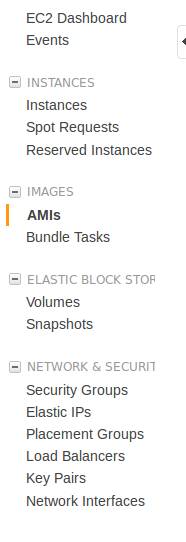
Navigation Pane in AWS Console
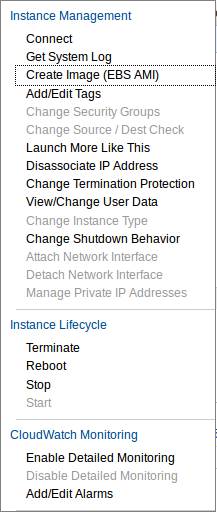
The menu we see on right-clicking in the instance
Now check the "AMI" pane. You will see an AMI being created when the status turns from "Pending" to "Available". You need to edit its permissions to be able to use it from another AWS account.
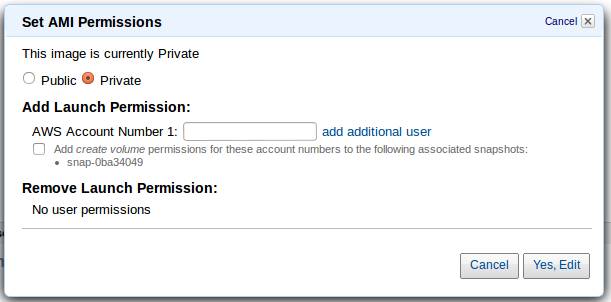
Popup to change AMI permission
Enter the account id of the AWS account to which you want to expose this AMI. To find the account id; See "My Account/console --> Security Credentials".
Now switch to another account's AWS console. Navigate to the "Instances" pane. Click the "Launch Instance" button, follow "Classic Wizard", in the "Community AMIs" tab, and search by entering the AMI id. A sample id will look like "ami-abcd1234".
Tip: If for some reason you couldn't get the AMI listed in the search result, try repeating the steps again or change the AMI permission to Public in the worst case.
Once the AMI is listed, you could follow on from here with the usual steps of Launching an instance. In a few minutes, you will have your server up and running.
In my case, the instance I had to move had a Web server running a Drupal site powered by Ubuntu.
As a follow-up to this process, I had to open up the HTTP, ssh, and other needed ports. Also had to create an Elastic IP and bind the same to the newly launched instance.
Finally from the domain registrar admin panel I had to change the DNS settings to use the new Elastic IP.
With this approach in less than a couple of hours, I was able to get my server switched from one account to another and start running as expected with the least downtime.